Introduction to Media Profiling for a UV Flatbed Ink Printer
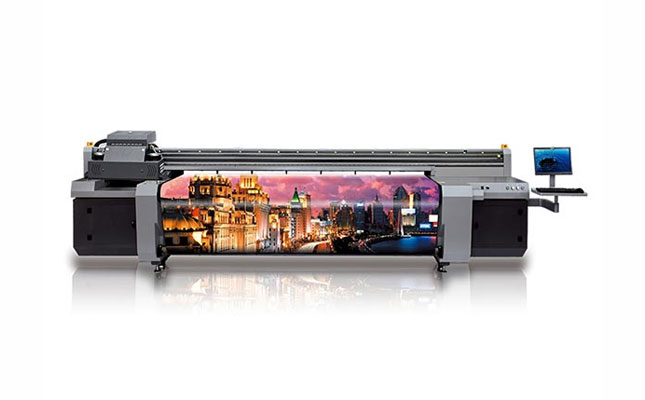
A uv flatbed ink printer is a versatile powerhouse capable of printing on acrylic, glass, wood, and metal. However, every unique surface reacts differently to uv ink. Because of this, you must create a custom media profile for new materials to ensure success.
A proper profile helps control ink flow, curing, and color quality. As a result, you get sharp images and strong adhesion. Many professionals using a uv ink printer skip this step. Unfortunately, skipping this step leads to poor color, weak bonding, or ink cracking. This guide explains how to create a media profile for a uv flatbed ink printer in simple, practical steps.
Why Custom Profiles Matter for a UV Flatbed Ink Printer
A media profile is a specific set of printing parameters. These settings tell the printer exactly how to behave on a specific substrate.
Enhanced Print Quality
Every substrate reacts differently to uv ink. A proper profile ensures smooth gradients and sharp text. Without it, you might experience bleeding or blurry edges.
Superior Ink Adhesion
Without the right curing settings, ink may peel or scratch easily. A custom profile ensures the uv ink bonds permanently to the surface.
Production Efficiency
A tuned profile allows faster printing without sacrificing quality. Furthermore, proper ink limits reduce unnecessary uv ink usage, saving you money over time.
Preparing Your UV Flatbed Ink Printer
Before creating a profile, you must prepare the machine. Cleanliness is the first step toward professional results.
- Clean the Printer: Make sure the print heads are clear. Run a nozzle check first to identify any issues.
- Check UV Lamps: UV lamps must cure the ink correctly. Weak lamps cause smudging or peeling, even with a good profile.
- Prepare the Surface: Some materials need cleaning before printing. Use isopropyl alcohol to remove dust, oil, and static. Clean surfaces vastly improve uv ink adhesion.
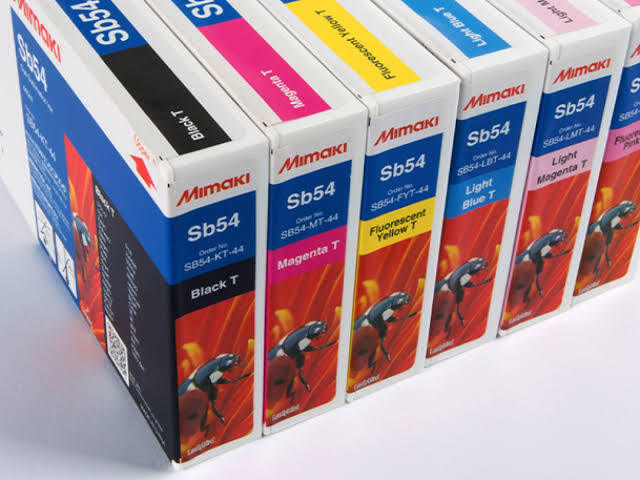
- Confirm Ink Type: Ensure the correct ink is installed. Many professional setups utilize high-quality mimaki uv ink designed for rigid materials.
Setting Up the New Media Profile
Open your RIP software to begin the process. Most RIP systems allow you to create a new media preset by entering the material name and thickness.
Step 1: Adjust Printer Height
Material thickness affects print quality significantly. Set the head height slightly above the substrate. Too high a height can cause ink misting or blurry prints. Too low a height can cause head strikes or ink smearing. Always check the recommended height for your specific uv flatbed ink printer.
Step 2: Establish Ink Limits for UV Ink
Too much uv ink causes bleeding, gloss pooling, and poor curing. Conversely, too little ink causes faded, dull colors. Print an ink limit test chart provided by your RIP software. Examine the blocks carefully to find where the ink starts pooling. Choose the highest level before these problems appear. This becomes the maximum limit for your uv ink printer.
Calibrating Pass Count and Speed
Pass count determines how many times the print head passes over the surface. Typical options include 6, 8, or 12 passes.
Lower pass counts print faster. However, they may reduce quality or cause visible lines. Higher pass counts improve detail but slow down production. Start testing with 8 passes to find a balance. Print a test pattern and check for color smoothness and curing. Choose the lowest pass count that maintains professional quality.
Adjusting UV Lamp Power
UV lamps cure the uv ink instantly. However, curing strength must match the specific material properties.
- Excessive UV Power: Too much heat can cause brittle ink layers or surface cracking.
- Insufficient UV Power: Low power results in wet ink, smearing, and weak bonding.
Run a curing test by printing a small sample. Gradually increase lamp power until the ink bonds firmly and passes a scratch test.
Color Profiling for Accurate Results
Color accuracy is essential in professional printing. Create an ICC color profile for your new material to ensure consistency.
- Print a color chart using the new media settings.
- Measure the chart with a spectrophotometer.
- Generate an ICC profile and import it into your RIP software.
This process ensures that brand colors appear consistent across different materials. Consistent color builds trust with your clients.
Testing Adhesion and Durability
After creating the profile, run durability tests. These tests confirm the profile is ready for a full production run.
The Scratch Test
Use your fingernail or a plastic card to scratch the printed area lightly. The uv ink should not peel or flake off.
The Tape Test
Apply strong adhesive tape to the print and pull it off quickly. If the ink stays intact on the substrate, your adhesion is excellent.
The Flex Test
For flexible materials, bend the substrate slightly. Check if the uv ink cracks under pressure.
Troubleshooting Common UV Flatbed Ink Printer Issues
Issues often arise during the initial setup phase. Knowing how to fix them saves time and material.
Ink Not Sticking
Possible causes include a dirty surface or low UV curing power. Clean the surface again and increase the lamp intensity.
Banding in Prints
Banding often occurs due to low pass counts or misaligned print heads. Increase the passes or run a head alignment calibration.
Dull or Faded Colors
Dull colors usually stem from incorrect ink limits. Reprint the ink limit chart and adjust the values in your software.
Expert Tips for Using Mimaki UV Ink
If your printer uses mimaki uv ink, follow these maintenance tips:
- Shake ink cartridges regularly to prevent pigment settling.
- Maintain a stable room temperature for consistent viscosity.
- Run daily nozzle checks to ensure the health of the print head.
Proper maintenance prevents expensive print head damage. It also ensures your uv ink printer stays reliable for years.
Professional Support for UV Printing Systems
Creating accurate profiles requires technical experience. Many businesses prefer expert guidance to optimize their uv flatbed ink printer performance.
Aura Sign Advertising is a leader in the UAE market. We specialize in the trading, servicing, and support of advanced digital technologies. We work with world-renowned brands like Mimaki, Roland, Epson, and KingJet. Our team provides dedicated after-sales services and maintenance contracts to ensure your success.
For reliable equipment and advanced supplies, you can also explore Izra UAE. As a trusted partner in the industry, Izra UAE provides comprehensive solutions for modern printing needs.
Future Trends: UV DTF Ink and Beyond
UV technology continues to evolve rapidly. Modern systems now support uv dtf ink applications, allowing for transfers onto irregular shapes. High-speed LED curing and multi-layer printing are also becoming standard. As technology advances, the role of an optimized media profile becomes even more vital for staying competitive.
Conclusion
Creating a custom media profile is essential for every uv flatbed ink printer. Each material requires specific settings for ink flow, curing, and color output. By adjusting ink limits, lamp power, and pass counts, you achieve consistent professional results. Proper testing ensures strong adhesion and prevents waste. With the right workflow, your uv ink printer will deliver reliable performance across many surfaces.